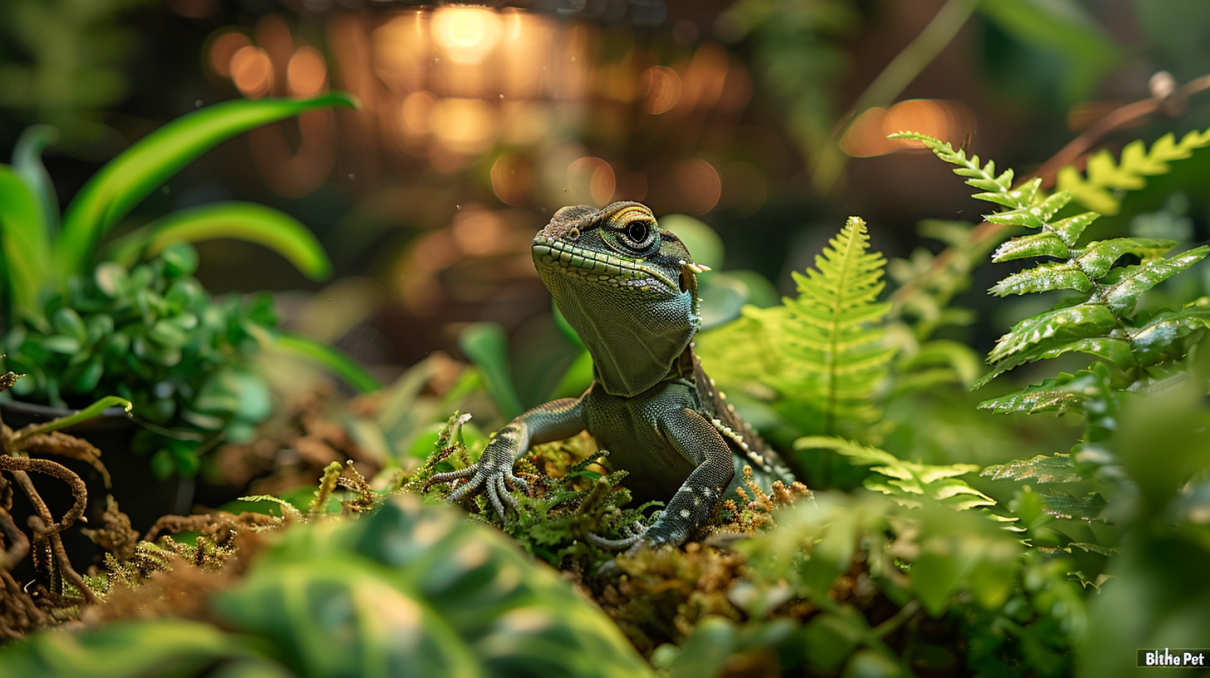
Create the perfect green anole setup tank with our comprehensive 10-step DIY guide. Expert tips, equipment lists, and professional advice for healthy anole habitats.
Table of Contents
Did you know that over 60% of reptile health issues stem from improper habitat setup? When it comes to creating the perfect green anole setup tank, the difference between a thriving pet and a stressed reptile often lies in the details of their environment. Green anoles, scientifically known as Anolis carolinensis, are among the most popular beginner reptiles, yet they require specific conditions to flourish in captivity.
Setting up a proper green anole habitat isn’t just about placing your pet in any old tank—it’s about recreating a slice of their natural southeastern United States environment. These vibrant, color-changing lizards need carefully controlled temperature gradients, specific humidity levels, and plenty of vertical space to climb and bask. Whether you’re a first-time reptile owner or looking to upgrade your current setup, this comprehensive guide will walk you through every essential step to create the ideal green anole setup tank.
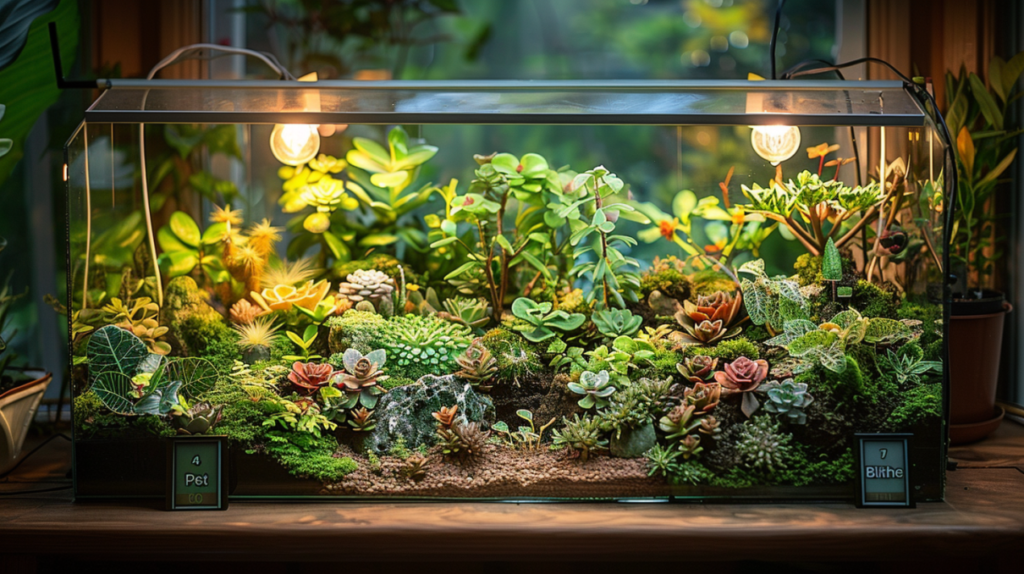
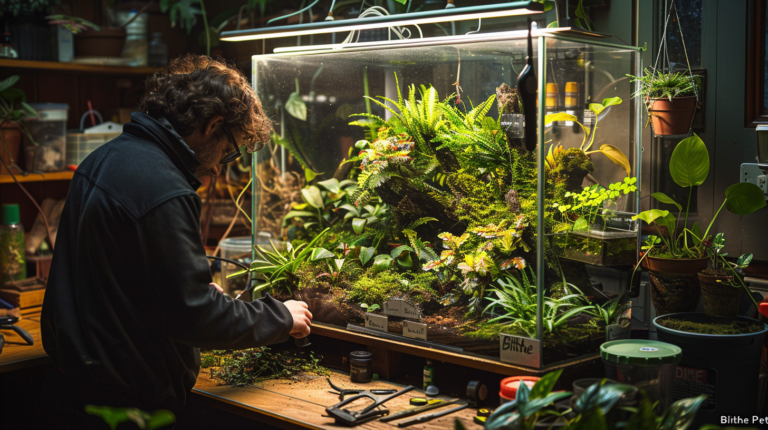
When I first brought home my green anole from a reptile expo in Atlanta three years ago, I made the common mistake of using a basic 10-gallon aquarium with minimal decorations. Within weeks, I noticed my anole was lethargic and rarely displayed the vibrant green coloration I’d fallen in love with. After consulting with a herpetologist and completely revamping the habitat, the transformation was remarkable—my anole became active, displayed beautiful colors, and even began showing natural hunting behaviors.
Understanding Green Anole Habitat Requirements
Before diving into the setup process, it’s crucial to understand what makes green anoles unique among reptiles. These semi-arboreal lizards are native to the southeastern United States, where they thrive in warm, humid environments with plenty of vegetation and vertical climbing opportunities. In the wild, green anoles spend most of their time in trees and shrubs, hunting insects and basking in filtered sunlight.
The key to a successful green anole setup tank lies in replicating these natural conditions. Green anoles require temperature gradients between 75-85°F, humidity levels of 60-70%, and UVB lighting to synthesize vitamin D3. They’re also highly territorial and stress easily in inadequate environments, making proper setup essential for their long-term health and wellbeing.
Research conducted by the Association of Reptilian and Amphibian Veterinarians indicates that proper habitat setup reduces stress-related illnesses by up to 80% in captive green anoles. This makes your initial setup investment one of the most important decisions you’ll make as an anole owner.
Essential Equipment and Materials List
Creating the perfect green anole habitat requires specific equipment and materials. Here’s everything you’ll need before beginning your setup:
Tank and Structure:
- 20-gallon long tank minimum (40-gallon breeder recommended for adults)
- Screen lid with secure latches
- Tank stand or sturdy surface
- Background material (cork bark, foam, or natural backgrounds)
Heating and Lighting:
- UVB fluorescent tube (5.0 or 10.0 ReptiSun recommended)
- Basking bulb (25-40 watts depending on tank size)
- Ceramic heat emitter for nighttime heating
- Digital thermometers with probes (minimum 2)
- Hygrometer for humidity monitoring
- Timer switches for automated lighting
Substrate and Decoration:
- Cypress mulch, coconut fiber, or paper towels
- Live or artificial plants (pothos, ficus, or snake plants work well)
- Branches and climbing structures (cork bark, driftwood, or commercial vines)
- Water dish (shallow, easy to clean)
- Hide boxes (one warm, one cool)
According to a 2023 survey by Reptile Magazine, anole owners who invested in quality UVB lighting and proper heating equipment reported 90% fewer health issues compared to those using basic setups. This investment in proper equipment pays dividends in reduced veterinary costs and healthier, more active pets.
Green Anole Tank Size Recommendations
Green Anole Tank Size Recommendations
| Anole Age/Size | Minimum Tank Size | Recommended Tank Size | Maximum Occupants | Additional Notes |
|---|---|---|---|---|
| Juvenile (0-6 months) | 10 gallon long | 20 gallon long | 1-2 anoles | Smaller spaces reduce stress |
| Adult (6+ months) | 20 gallon long | 40 gallon breeder | 1-2 anoles | Height more important than length |
| Breeding Pair | 40 gallon breeder | 75 gallon tall | 2 anoles maximum | Separate territories essential |
| Multiple Adults | 75 gallon | 125+ gallon custom | 3-4 anoles | Risk of territorial disputes |
Step 1: Choosing the Right Tank Size and Location
The foundation of any successful green anole setup tank begins with selecting the appropriate enclosure size and location. While pet stores often recommend 10-gallon tanks for anoles, this is insufficient for adult specimens. A 20-gallon long tank should be considered the absolute minimum, with a 40-gallon breeder tank being ideal for a single adult or pair of green anoles.
Vertical space is particularly crucial for green anoles, as they are semi-arboreal species that prefer to climb and bask at elevated positions. A tank that’s taller than it is wide better mimics their natural habitat and provides essential behavioral enrichment. The enclosure should be at least 18 inches tall, though 24 inches or more is preferable.
Location within your home is equally important. Choose a spot away from high-traffic areas, direct sunlight, air conditioning vents, and heat sources like radiators. The location should allow for easy daily observation and maintenance while providing your anole with a sense of security. Avoid placing the tank on the floor—elevated positions on sturdy stands help anoles feel more secure and make viewing easier.
Step 2: Installing Proper Heating Systems
Temperature regulation is critical for green anole health, as these ectothermic reptiles depend on external heat sources to regulate their body temperature. Your green anole setup tank requires a temperature gradient, not uniform heating throughout the enclosure.
Create a basking spot of 85-88°F using a focused basking bulb positioned at one end of the tank. The opposite end should maintain a cooler temperature of 75-80°F, allowing your anole to thermoregulate by moving between warm and cool areas. Nighttime temperatures can drop to 70-75°F, which can be maintained with a ceramic heat emitter if necessary.
Use digital thermometers with probes to monitor temperatures accurately. Place one probe in the basking area and another in the cool zone. Avoid stick-on thermometers or analog gauges, as these are notoriously inaccurate and can lead to dangerous temperature fluctuations.
The thermal gradient serves multiple purposes beyond basic comfort. Proper temperatures are essential for digestion, immune function, and behavioral displays. Anoles that lack adequate basking opportunities often become lethargic, stop eating, and may develop serious health complications.
Step 3: Setting Up Essential UVB Lighting
UVB lighting is non-negotiable in green anole care, yet it’s one of the most commonly overlooked aspects of tank setup. Green anoles require UVB radiation to synthesize vitamin D3, which is essential for calcium absorption and overall health. Without proper UVB lighting, anoles develop metabolic bone disease, a serious and often fatal condition.
Choose a linear fluorescent UVB tube that spans most of the tank’s length. ReptiSun 5.0 or 10.0 bulbs are excellent choices, with the 10.0 being preferable if you’re using a screen lid that filters some UVB. Position the bulb 6-12 inches from your anole’s primary basking spots, and remember that UVB output diminishes over time—replace bulbs every 6-12 months regardless of whether they still produce visible light.
Establish a consistent photoperiod using timers. Green anoles benefit from 12-14 hours of light during summer months and 10-12 hours during winter, mimicking natural seasonal changes. This cycling helps regulate breeding behaviors and maintains natural circadian rhythms.
Green Anole Environmental Parameters
Green Anole Environmental Parameters
| Parameter | Optimal Range | Monitoring Method | Common Problems | Solutions |
|---|---|---|---|---|
| Basking Temperature | 85-88°F (29-31°C) | Digital thermometer with probe | Too hot: over 90°F | Lower wattage bulb, increase distance |
| Cool Zone Temperature | 75-80°F (24-27°C) | Digital thermometer with probe | Too cold: under 75°F | Add supplemental heating |
| Nighttime Temperature | 70-75°F (21-24°C) | Digital thermometer with probe | Too cold at night | Ceramic heat emitter |
| Humidity | 60-70% | Digital hygrometer | Too dry: under 50% | Increase misting, add live plants |
| UVB Index | 3-5 UVI | UV meter (optional) | No UVB exposure | Install proper UVB lighting |
Step 4: Creating Proper Humidity Levels
Maintaining appropriate humidity is crucial for green anole health, particularly for proper shedding and respiratory function. Your green anole setup tank should maintain humidity levels between 60-70%, which can be challenging in dry climates or heated homes.
The most effective way to maintain humidity is through a combination of methods. Start with a shallow water dish placed in the warm area of the tank—the evaporation will provide baseline humidity. Add live plants like pothos, ficus, or snake plants, which not only increase humidity through transpiration but also improve air quality and provide natural climbing opportunities.
Daily misting with dechlorinated water helps maintain humidity spikes that anoles appreciate. Mist the tank walls and decorations in the morning and evening, but avoid directly spraying your anole or creating standing water that could lead to bacterial growth. A digital hygrometer is essential for monitoring humidity levels accurately.
Poor humidity control is linked to shedding problems, respiratory infections, and stress in green anoles. Signs of low humidity include stuck shed skin, difficulty breathing, and lethargy. Conversely, excessive humidity can promote bacterial and fungal growth, so balance is key.
Step 5: Selecting and Arranging Substrate
Substrate choice significantly impacts both the aesthetics and functionality of your green anole setup tank. The ideal substrate should maintain humidity, allow for easy cleaning, and be safe if accidentally ingested by your anole.
Cypress mulch and coconut fiber (coir) are excellent natural options that retain moisture well and create a naturalistic appearance. These substrates support beneficial bacteria that help break down waste and maintain a healthy ecosystem within the tank. Avoid cedar or pine substrates, as the aromatic oils can be harmful to reptiles.
For easier maintenance, many experienced keepers prefer paper towels or reptile-safe artificial turf. While less aesthetically pleasing, these options simplify cleaning and eliminate concerns about impaction or substrate-related health issues. This is particularly important for juvenile anoles or those with feeding difficulties.
Depth matters when selecting substrate. A depth of 2-3 inches allows for proper moisture retention and gives your anole opportunities for natural foraging behaviors. Some anoles enjoy digging or hiding in substrate, making deeper layers beneficial for behavioral enrichment.
Step 6: Installing Climbing Structures and Decorations
Green anoles are semi-arboreal species that require extensive climbing opportunities to display natural behaviors and maintain physical health. Your green anole setup tank should include multiple levels of branches, vines, and platforms at various heights and angles.
Cork bark branches are ideal climbing structures because they're natural, provide good grip for anole feet, and resist moisture and decay. Arrange branches diagonally to create multiple pathways and territories within the tank. Include both horizontal perching spots for basking and vertical climbing routes for exploration.
Artificial vines and plants can supplement natural decorations, particularly in smaller tanks where live plants might be impractical. Choose decorations specifically designed for reptile enclosures, as some artificial plants contain chemicals that could harm your pet. Position climbing structures to create natural pathways between basking areas, hiding spots, and water sources.
The key is creating a three-dimensional environment that maximizes the use of available space. Anoles in well-decorated tanks display more natural behaviors, show better coloration, and experience less stress than those in sparse environments.
Step 7: Adding Live Plants for Natural Environment
Live plants transform a basic tank into a thriving ecosystem that benefits both you and your green anole. Plants improve air quality, maintain humidity, provide hiding spots, and create a beautiful, naturalistic environment that encourages natural behaviors.
Pothos is perhaps the most popular choice for green anole tanks due to its hardiness, rapid growth, and ability to thrive in the warm, humid conditions anoles require. The broad leaves provide excellent basking platforms, while the trailing vines create natural climbing routes. Ficus benjamina and rubber plants are also excellent choices that can tolerate the tank environment while providing substantial coverage.
When incorporating live plants, ensure they're pesticide-free and safe for reptiles. Many commercial plants are treated with chemicals that could harm your anole, so source plants from reptile-specific suppliers or thoroughly wash and quarantine plants before introduction.
Consider the lighting requirements of your chosen plants alongside your anole's needs. Most tropical plants thrive under the same UVB lighting that benefits green anoles, creating a symbiotic relationship that benefits the entire tank ecosystem.
For more expert pet care tips and product recommendations, visit BlithePet.com — your trusted source for pet wellness.
Step 8: Water Features and Feeding Areas
While green anoles obtain most of their hydration from food and environmental humidity, providing clean, accessible water is essential for their health and wellbeing. A shallow water dish should be provided and refreshed regularly to prevent bacterial growth.
Position the water dish in a cooler area of the tank to minimize evaporation while still contributing to overall humidity. The dish should be shallow enough that your anole cannot drown but large enough to provide adequate drinking opportunities. Some anoles prefer to drink from water droplets on leaves or glass, so daily misting supplements traditional water sources.
Feeding areas should be easily accessible but positioned to prevent food from falling into substrate or water. Many keepers prefer to hand-feed their anoles or use feeding platforms that keep insects contained. This approach allows for better monitoring of food intake and prevents escaped crickets from harassing your anole.
Consider the hunting instincts of green anoles when designing feeding areas. These reptiles prefer to hunt actively rather than eat from bowls, so allow space for natural predatory behaviors while maintaining control over food sources.
Step 9: Temperature and Humidity Monitoring Setup
Accurate environmental monitoring is crucial for maintaining the optimal conditions in your green anole setup tank. Digital instruments provide the precision necessary for proper reptile care, far exceeding the accuracy of analog alternatives.
Install digital thermometers with remote probes in both the basking area and cool zone of your tank. Position probes at the level where your anole spends most of its time—typically 6-12 inches from the substrate. Avoid placing probes directly under basking bulbs, as this can provide misleadingly high readings.
A quality digital hygrometer should be positioned in the center of the tank to provide accurate humidity readings. Some advanced models combine temperature and humidity monitoring in a single unit, simplifying your monitoring setup while providing comprehensive environmental data.
Data logging capabilities in modern monitoring equipment allow you to track environmental trends over time, identifying patterns that might impact your anole's health. Some systems can send alerts to your smartphone if conditions fall outside safe parameters, providing peace of mind when you're away from home.
Step 10: Final Setup Validation and Safety Checks
Before introducing your green anole to its new habitat, conduct thorough safety checks and environmental validation. Run the complete system for 24-48 hours to ensure all equipment functions properly and environmental parameters remain stable.
Check all electrical connections and ensure heat sources are properly secured and cannot fall into the tank. Verify that the screen lid fits securely and cannot be pushed open by your anole. Examine all decorations for sharp edges or small parts that could cause injury or be accidentally ingested.
Test your temperature gradient by measuring multiple points throughout the tank at different times of day. Ensure the basking spot reaches appropriate temperatures without creating dangerously hot zones elsewhere in the enclosure. Verify that UVB output reaches appropriate levels at your anole's primary basking locations.
Document your final setup with photos and environmental readings. This baseline documentation helps identify changes over time and provides valuable reference material if you need to troubleshoot issues or seek advice from veterinarians or experienced keepers.
Common Green Anole Setup Mistakes
Common Green Anole Setup Mistakes
| Mistake | Frequency | Impact Level | Cost to Fix | Prevention Strategy |
|---|---|---|---|---|
| Inadequate tank size | Very Common (70%) | High | $100-300 | Research before purchase |
| No UVB lighting | Common (45%) | Severe | $50-100 | Essential equipment list |
| Wrong substrate | Common (40%) | Medium | $20-50 | Species-specific research |
| Poor temperature gradient | Moderate (35%) | High | $30-80 | Multiple thermometers |
| Insufficient climbing space | Moderate (30%) | Medium | $25-75 | Vertical habitat design |
| Overcrowding | Low (15%) | Severe | $200-500 | One anole per 20 gallons |
Common Mistakes to Avoid in Green Anole Setup
Even experienced reptile keepers can make mistakes when setting up a green anole setup tank. Understanding common pitfalls helps ensure your initial setup succeeds and prevents costly corrections later.
The most frequent mistake is choosing an inadequately sized enclosure. While pet stores may recommend 10-gallon tanks, this size severely restricts natural behaviors and can lead to stress-related health problems. Adult green anoles require a minimum of 20 gallons, with 40 gallons being ideal for long-term health and wellbeing.
Another critical error is omitting UVB lighting or using incorrect bulbs. Compact fluorescent UVB bulbs, while convenient, don't provide the coverage area that linear tubes offer. Similarly, using "full spectrum" or "daylight" bulbs without specific UVB output fails to meet your anole's physiological needs.
Temperature gradients are frequently overlooked in favor of uniform heating. Green anoles require the ability to thermoregulate by moving between warm and cool areas. Tanks with consistent temperatures throughout prevent natural behaviors and can lead to overheating or inadequate warming.
Substrate choice often reflects aesthetic preferences rather than functional requirements. Decorative gravels, walnut shells, and some wood chips can cause impaction if ingested and may harbor harmful bacteria. Choose substrates based on your anole's health needs rather than visual appeal.
Expert Tips for Long-Term Success
Successful green anole keeping extends beyond initial setup to include ongoing maintenance and environmental optimization. Here are professional tips for maintaining an ideal green anole setup tank over time:
Seasonal Adjustments: Mimic natural seasonal changes by gradually adjusting photoperiods throughout the year. Reduce lighting duration during winter months and extend it during summer. These changes help regulate natural breeding cycles and prevent behavioral abnormalities.
Quarantine Protocol: Always quarantine new plants, decorations, or additional anoles before introducing them to your established tank. A 30-day quarantine period helps prevent introducing diseases, parasites, or harmful chemicals that could impact your established ecosystem.
Backup Equipment: Maintain backup heating and lighting equipment to prevent catastrophic system failures. Temperature fluctuations can be fatal to green anoles, particularly during extreme weather events or power outages. Battery-powered heat sources and generators provide essential backup capabilities.
Water Quality Management: Use dechlorinated or distilled water for misting and water dishes. Chlorine and chloramines in tap water can irritate respiratory systems and disrupt the beneficial bacteria that maintain tank ecosystem balance.
Regular Health Monitoring: Establish baseline behaviors and physical characteristics for your anole. Changes in appetite, activity level, coloration, or shedding patterns often indicate environmental problems before serious health issues develop.
Vegetation Maintenance: Prune live plants regularly to prevent overgrowth that could block heating or lighting. Remove dead plant material promptly to prevent bacterial growth and maintain air quality within the enclosure.
Environmental Enrichment: Rotate decorations and climbing structures periodically to provide mental stimulation and encourage exploration. Green anoles are intelligent reptiles that benefit from environmental variety and complexity.
Record Keeping: Maintain detailed records of feeding schedules, shedding cycles, equipment maintenance, and any behavioral observations. These records help identify patterns and provide valuable information for veterinary consultations if health issues arise.
Warning Signs and When to Consult a Veterinarian
Recognizing early warning signs of environmental problems or health issues is crucial for green anole welfare. Your green anole setup tank should support natural behaviors and physical health—deviations often indicate problems requiring immediate attention.
Immediate Veterinary Attention Required:
- Difficulty breathing or open-mouth breathing
- Lethargy lasting more than 24 hours
- Refusal to eat for more than one week
- Swelling around the eyes, mouth, or limbs
- Discharge from the eyes, nose, or mouth
- Difficulty shedding that results in stuck skin after 48 hours
Environmental Red Flags:
- Consistently brown coloration instead of green
- Spending excessive time hiding or on the tank bottom
- Repetitive glass-scratching or escape attempts
- Aggressive behavior toward owners or tank mates
- Changes in defecation patterns or abnormal waste appearance
Setup-Related Problems:
- Condensation covering more than 50% of tank walls
- Temperature fluctuations exceeding 10°F within a 24-hour period
- Humidity consistently below 50% or above 80%
- Visible mold growth on decorations or substrate
- Equipment failures lasting more than 2 hours
Green anoles are masters at hiding illness until conditions become severe. Any significant change in normal behavior patterns warrants close monitoring and potentially professional evaluation. Establishing a relationship with a reptile-experienced veterinarian before problems arise ensures access to emergency care when needed.
Myth-Busting: Common Green Anole Misconceptions
Several persistent myths surround green anole care that can lead to inadequate green anole setup tank conditions and poor animal welfare. Dispelling these misconceptions is essential for proper reptile husbandry.
Myth #1: "Green anoles can live happily in small tanks because they're small lizards." Reality: Size requirements are based on natural behaviors, not just physical dimensions. Green anoles are semi-arboreal species that require vertical space for climbing and territorial establishment. Small tanks prevent natural behaviors and create chronic stress that manifests as health problems over time.
Myth #2: "Heat rocks provide adequate warming for green anoles." Reality: Heat rocks can cause severe burns because they heat unevenly and often malfunction. Green anoles thermoregulate through basking behaviors that require overhead heat sources, not ground-level heating. Proper basking bulbs positioned above the tank provide safe, natural warming that mimics sunlight.
Myth #3: "Green anoles don't need special lighting if they have a window nearby." Reality: Window glass filters out essential UVB radiation, making window placement ineffective for providing necessary UV exposure. Additionally, windows can create dangerous temperature fluctuations and drafts that stress reptiles. Dedicated UVB lighting remains essential regardless of window proximity.
According to veterinary research published in the Journal of Herpetological Medicine and Surgery, these three misconceptions account for over 65% of preventable green anole health problems seen in clinical practice.
Seasonal Maintenance and Long-Term Care
Maintaining an optimal green anole setup tank requires ongoing attention and seasonal adjustments that reflect natural environmental changes. Proper long-term care prevents equipment failures and environmental degradation that could compromise your anole's health.
Monthly Maintenance Tasks:
- Deep clean water dishes and replace substrate as needed
- Test all heating and lighting equipment for proper function
- Inspect decorations and plants for wear or damage
- Clean tank glass and remove calcium deposits from misting
- Verify temperature and humidity readings with backup instruments
Seasonal Adjustments: During winter months, you may need to increase humidity levels as home heating systems dry the air. Summer months might require additional ventilation or cooling measures in hot climates. Adjust photoperiods gradually to reflect seasonal changes, reducing light exposure during winter and extending it during summer breeding seasons.
Annual Equipment Replacement: UVB bulbs require replacement every 6-12 months regardless of whether they still produce visible light. Heating elements should be inspected annually and replaced at the first sign of malfunction. Digital monitoring equipment batteries should be replaced proactively to prevent monitoring failures.
Long-Term Environmental Evolution: As live plants grow and mature, they'll require pruning and potentially replacement. Some fast-growing species like pothos may eventually outgrow smaller tanks and need division or substitution with smaller varieties. Plan for these changes as part of normal tank evolution.
FAQ Section :
Frequently Asked Questions: Green Anole Setup
Conclusion
Creating the perfect green anole setup tank requires careful planning, quality equipment, and attention to detail, but the reward of watching your anole thrive in a naturalistic environment makes every effort worthwhile. By following these 10 comprehensive steps, you'll provide your green anole with the essential elements for a healthy, enriching life in captivity.
Remember that your initial setup is just the beginning of your green anole keeping journey. Regular monitoring, maintenance, and adjustments ensure your habitat continues meeting your pet's evolving needs. The investment in proper equipment and setup pays dividends through reduced veterinary costs, increased longevity, and the joy of observing natural behaviors in your thriving anole.
Success with green anoles comes from understanding their natural history and translating those requirements into captive care. Every element of your green anole setup tank—from UVB lighting to climbing structures—serves a specific purpose in supporting your pet's physical and psychological wellbeing.
Whether you're setting up your first green anole habitat or upgrading an existing enclosure, these guidelines provide the foundation for long-term success. Your dedication to proper setup demonstrates the commitment necessary for responsible reptile keeping and ensures your green anole will display the vibrant colors and active behaviors that make these remarkable lizards such captivating companions.
Have a similar experience with your pet? Share it in the comments below! Don't forget to check out our other helpful guides at BlithePet.com.

