Learn essential pet first aid skills to handle emergencies confidently. From bleeding control to CPR, master 5 critical techniques every pet owner needs. Protect your furry family!
Table of Contents
Introduction to Pet First Aid

According to the American Veterinary Medical Association, one in four pets will experience a medical emergency in their lifetime. Despite this alarming statistic, less than 20% of pet owners feel confident in their ability to provide emergency care when needed. Pet first aid knowledge equips you with crucial skills to address emergencies promptly and effectively.
Dr. Sarah Johnson, emergency veterinarian at Central Animal Hospital, emphasizes: “The initial minutes following a pet injury are critical. Appropriate first aid administered by pet owners can significantly improve outcomes before professional veterinary care is accessed.”
Why Pet First Aid Knowledge Matters
- Critical time-saving: Immediate response can prevent condition deterioration
- Pain reduction: Proper techniques minimize animal discomfort
- Survival rates: Increases chances of positive outcomes in life-threatening situations
- Owner confidence: Reduces panic and promotes clear thinking during emergencies
- Cost efficiency: Early intervention may reduce overall treatment expenses
Before diving into specific emergency responses, remember these universal principles:
- Safety first: Ensure your safety before attempting to help an injured pet
- Remain calm: Animals sense anxiety; maintaining composure helps both you and your pet
- Have a plan: Know your emergency vet’s location and contact information
- Practice prevention: Many emergencies can be avoided through proper pet-proofing and supervision
Now, let’s explore the five fundamental pet first aid techniques every pet owner should master.
Emergency #1: Bleeding and Wound Care
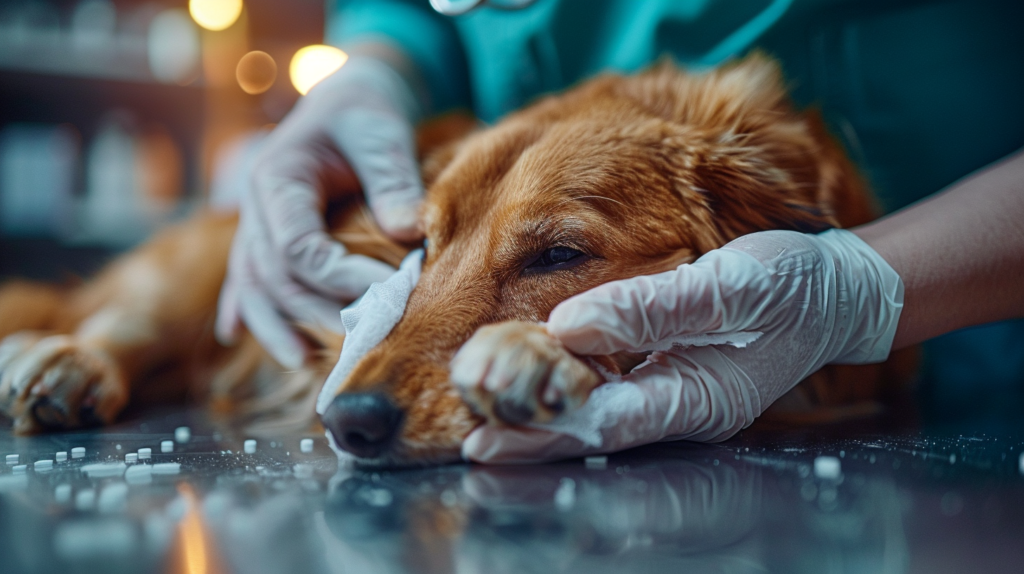
Wounds and bleeding represent among the most common pet emergencies requiring immediate intervention. From minor cuts to severe lacerations, knowing how to properly assess and control bleeding can prevent dangerous blood loss.
Assessing the Severity of Bleeding
Before treatment, quickly evaluate the wound type:
| Wound Type | Description | First Aid Priority |
| Arterial | Bright red blood pulsing/spurting | Immediate pressure, emergency vet |
| Venous | Darker red, steady flow | Direct pressure, possible vet visit |
| Capillary | Surface bleeding, slow oozing | Clean and bandage, monitor |
| Puncture | Small entry hole, potential depth | Clean, monitor for infection |
| Laceration | Jagged tear in tissue | Clean, assess depth, possible vet visit |
Steps for Treating External Bleeding
- Apply direct pressure
- Use a clean cloth, gauze pad, or towel
- Press firmly against the wound for at least 5-10 minutes
- Do not remove the pressure to check bleeding—this disrupts clot formation
- Elevate the wound (if possible and not contraindicated by potential fractures)
- Raise the injured area above heart level to reduce blood flow
- Only attempt if it doesn’t cause additional pain or distress
- Apply a pressure bandage
- Once bleeding slows, apply a clean bandage
- Wrap firmly enough to maintain pressure but not restrict circulation
- Check toes/extremities for coldness or swelling (signs of too-tight bandaging)
Wound Cleaning Protocol
For minor wounds that don’t require immediate veterinary attention:
- Gently clean the area
- Use warm water or saline solution
- Avoid hydrogen peroxide on open wounds as it damages healing tissues
- Pat (don’t rub) the wound dry with clean gauze
- Apply appropriate antiseptic
- Use pet-safe antiseptic solutions like diluted chlorhexidine
- Avoid alcohol or iodine directly on open wounds
- Prevent self-trauma
- Consider an E-collar (cone) if your pet licks or chews the wound
- Monitor for signs of infection (increased redness, swelling, discharge)
Case Study: When Max, a 4-year-old Golden Retriever, cut his paw pad on broken glass during a walk, his owner immediately applied direct pressure using a clean handkerchief. After controlling the bleeding, she wrapped the paw in gauze and took Max to the veterinarian, who praised her quick action. The prompt first aid prevented excessive blood loss and reduced risk of infection.
IMPORTANT: Always seek veterinary care for:
- Wounds longer than 1 inch
- Wounds on the face, eyes, genitals, or joints
- Deep puncture wounds
- Wounds with visible bone, muscle, or fat
- Wounds that continue bleeding after 10 minutes of pressure
- Any animal bite wounds (high infection risk)
Emergency #2: CPR and Rescue Breathing
Cardiopulmonary resuscitation (CPR) is an essential pet first aid skill that can be life-saving when a pet experiences cardiac or respiratory arrest. Understanding proper technique is crucial, as improper CPR can cause additional injury.
When to Perform CPR
Before initiating CPR, quickly assess your pet for:
- Responsiveness
- Call your pet’s name and gently touch them
- Check for movement or response
- Breathing
- Watch for chest movement
- Feel for breath against your cheek
- Normal breathing rates: Dogs (10-30 breaths/minute), Cats (20-30 breaths/minute)
- Pulse
- Check femoral pulse (inner thigh)
- Normal heart rates: Dogs (60-140 bpm), Cats (140-220 bpm)
Only proceed with CPR if your pet shows no signs of breathing or heartbeat.
CPR Technique for Dogs
- Position your dog
- Place on a firm, flat surface
- Right side down for large dogs
- Back down for small dogs/puppies
- Airway
- Extend the neck slightly
- Pull the tongue forward
- Check for and remove any visible obstructions
- Breathing (Rescue Breaths)
- Close the mouth and create a seal over the nostrils
- For small dogs: cover both nose and mouth
- Deliver 2 gentle breaths, watching for chest rise
- Each breath should last 1 second
- Circulation (Chest Compressions)
- For large dogs: Place hands over the widest part of the chest
- For small dogs: Cup hand around chest or use thumb and fingers on either side
- Compress 1/3 to 1/2 the chest width
- Rate: 100-120 compressions per minute
- Allow full chest recoil between compressions
- Compression to Ventilation Ratio
- 30 compressions followed by 2 rescue breaths
- Continue until breathing/heartbeat returns or veterinary assistance arrives
CPR Technique for Cats
- Position
- Place on right side or back
- Ensure neck is slightly extended
- Breathing
- Create a tight seal around nose and mouth
- Deliver gentle breaths watching for chest rise
- Each breath should last approximately 1 second
- Compressions
- Place hand around sternum (where elbow meets chest)
- Compress 1/3 to 1/2 the chest width
- Rate: 100-120 compressions per minute
- Use less force than for dogs
According to a study published in the Journal of Veterinary Emergency and Critical Care, pets receiving proper CPR within the first two minutes of cardiac arrest have a survival rate nearly three times higher than those receiving delayed intervention.
Expert Insight: “Many pet owners hesitate to perform CPR because they fear doing it incorrectly,” notes Dr. Michael Davis, veterinary critical care specialist. “However, attempting CPR, even if technique isn’t perfect, offers better survival chances than doing nothing at all.”
IMPORTANT: CPR should be performed only in true emergencies when breathing and pulse are absent. Unnecessary CPR on a breathing animal can cause serious injury.
Emergency #3: Choking Management

Choking occurs when a foreign object partially or completely blocks the airway, preventing normal breathing. Quick recognition and response to choking is a critical pet first aid skill that can save your pet’s life.
Signs of Choking in Pets
- Difficulty breathing or gasping
- Excessive pawing at the mouth
- Extreme distress or panic
- Blue or purple tongue/gums (cyanosis)
- Unconsciousness (in severe cases)
- Excessive drooling
- Making choking or gagging sounds
Heimlich Maneuver for Conscious Pets
For Small Dogs and Cats:
- Hold your pet with their back against your chest
- Make a fist with one hand and place it just below the ribcage
- Support your pet with your other arm
- Give 5 quick, firm inward and upward thrusts
- Check the mouth for any dislodged object
- Repeat if necessary
For Medium to Large Dogs:
- Stand behind your dog if they’re standing
- Wrap your arms around their abdomen just below the ribcage
- Make a fist with one hand and place it just below the ribcage
- Cover your fist with your other hand
- Give 5 quick, firm inward and upward thrusts
- Check the mouth for any dislodged object
- Repeat if necessary
For Unconscious Pets:
- Place your pet on their side
- Pull the tongue forward and check for visible obstructions
- Sweep finger through the mouth to remove any object (be careful not to push it deeper)
- If object isn’t visible or retrievable, perform the following:
- For small pets: Place thumb and fingers on either side of the ribcage
- For larger pets: Place both hands under the abdomen just below ribcage
- Apply 5 quick, firm inward and upward thrusts
- Check the mouth again
- If still obstructed, continue alternating between thrusts and mouth checks
What NOT to Do During Choking Episodes
- Never blindly stick fingers down throat without seeing the object
- Avoid excessive force that could damage internal organs
- Don’t waste time searching for objects if your pet is in severe distress—proceed with first aid measures
- Never shake a pet upside down (especially puppies or kittens)
According to pet insurance provider Trupanion, foreign body obstructions account for over 40,000 claims annually, with an average treatment cost of $1,500.
Case Study: When Charlie, a 2-year-old French Bulldog, began choking on a chew toy fragment, his owner immediately performed the Heimlich maneuver as learned in a pet first aid course. After three quick thrusts, the object dislodged, and Charlie resumed normal breathing. The veterinarian later confirmed that this prompt action likely saved Charlie’s life.
IMPORTANT: Even if you successfully dislodge an object and your pet appears normal, veterinary examination is recommended to check for potential airway damage or lingering fragments.
Emergency #4: Poisoning Response

Pet poisoning emergencies require immediate recognition and appropriate response. The American Society for the Prevention of Cruelty to Animals (ASPCA) Poison Control Center handles over 385,000 cases of pet poisoning annually, highlighting the frequency of this emergency.
Common Household Toxins
| Category | Common Toxins | Symptoms |
| Foods | Chocolate, xylitol, grapes/raisins, onions, alcohol | Vomiting, diarrhea, hyperactivity, seizures |
| Medications | NSAIDs, acetaminophen, antidepressants | Lethargy, vomiting, pale gums, abdominal pain |
| Plants | Lilies, sago palms, tulips, azaleas | Drooling, vomiting, diarrhea, lethargy |
| Chemicals | Antifreeze, fertilizers, insecticides | Seizures, vomiting, excessive drooling, disorientation |
| Household Items | Essential oils, batteries, detergents | Respiratory distress, burns, drooling, vomiting |
Steps for Responding to Poisoning
- Remove your pet from the toxin source
- Prevent further exposure
- Ensure your safety when handling potentially toxic substances
- Identify the toxin if possible
- Secure the container, packaging, or plant sample
- Note approximate amount ingested
- Record time of exposure/ingestion
- Contact emergency services
- Call your veterinarian or emergency animal hospital
- ASPCA Poison Control: (888) 426-4435 (fee may apply)
- Pet Poison Helpline: (855) 764-7661 (fee may apply)
- Follow professional guidance regarding:
- Whether to induce vomiting (NEVER do this without professional direction)
- What information to bring to veterinary appointment
- Immediate home care instructions
When NOT to Induce Vomiting
Never induce vomiting if:
- Your pet is unconscious or severely lethargic
- Your pet is experiencing seizures
- Your pet has ingested caustic substances (acids, alkalis, petroleum products)
- Your pet has swallowed sharp objects
- More than 2 hours have passed since ingestion
- Your pet is a breed with respiratory challenges (brachycephalic)
Creating a Poison Response Plan
- Post emergency numbers in a visible location:
- Your regular veterinarian
- Nearest emergency veterinary hospital
- Poison control hotlines
- Maintain a pet poison kit:
- Fresh 3% hydrogen peroxide (for inducing vomiting ONLY when directed by a professional)
- Turkey baster or oral syringe (for administering hydrogen peroxide if instructed)
- Activated charcoal (use only when recommended by veterinarian)
- Rubber gloves
- Pet carrier for transport
- Document your pet’s information:
- Weight (updated regularly)
- Age
- Existing medical conditions
- Current medications
Research from the Veterinary Journal indicates that poisoning outcomes improve by up to 60% when appropriate first aid is administered within 30 minutes of exposure and professional care is sought promptly.
Expert Insight: “In poisoning cases, time is truly of the essence,” explains toxicologist Dr. Karen Thompson. “The specifics of the toxin matter greatly—what’s appropriate for one type of poisoning may be dangerous for another. Always contact a professional before administering any home treatment.”
IMPORTANT: Prevention remains the best strategy. Conduct regular home safety checks to identify and secure potential toxins, keeping them well out of your pet’s reach.
Emergency #5: Seizure Management

Seizures can be terrifying to witness but understanding proper pet first aid for these neurological events is crucial for your pet’s safety. Approximately 5% of dogs will experience seizures during their lifetime, according to the American College of Veterinary Internal Medicine.
Recognizing Different Types of Seizures
- Grand Mal (Generalized) Seizures
- Full body involvement
- Loss of consciousness
- Paddling limbs, jaw chomping
- Urination/defecation may occur
- Duration typically 1-3 minutes
- Focal (Partial) Seizures
- Affects specific body part/region
- May remain conscious
- Repetitive movements (facial twitching, limb movements)
- May progress to generalized seizure
- Petit Mal Seizures
- Brief episodes of altered awareness
- Vacant staring
- Minimal physical symptoms
- May go unnoticed by owners
Seizure First Aid Protocol
- During the seizure:
- Note the time (duration is important information)
- Clear the area of objects that could cause injury
- Keep other pets away
- Do NOT place anything in your pet’s mouth
- Do NOT restrain your pet
- Speak calmly and reassuringly
- Dim lights and reduce noise if possible
- Place cushions around (not under) your pet to prevent injury
- Post-seizure care (postictal phase):
- Maintain calm environment
- Monitor breathing and consciousness
- Gently comfort your pet
- Keep water available but don’t force drinking
- Allow recovery in a quiet space
- Prevent falls or accidents as pet may be disoriented
When to Seek Emergency Care
Immediate veterinary attention is required if:
- First-time seizure occurs
- Seizure lasts longer than 3 minutes
- Multiple seizures occur within 24 hours
- Seizure occurs in a pregnant pet
- Pet doesn’t regain consciousness between seizures
- Pet is under 1 year or over 8 years (first-time seizure)
- Any injury occurs during the seizure
Documenting Seizure Events
Maintaining a seizure log provides valuable information for your veterinarian:
- Date and time of seizure
- Duration
- Pre-seizure behavior (any triggers or warning signs)
- Description of seizure activity
- Post-seizure behavior and recovery time
- Any potential triggers (recent medications, environmental factors)
A study in the Journal of Veterinary Neurology found that accurate owner documentation of seizure patterns helped improve treatment efficacy by 35% compared to cases with limited information.
Case Study: When Bella, a 5-year-old Border Collie, experienced her first seizure, her owner carefully timed the event (90 seconds), cleared nearby furniture, and created a video recording. This documentation helped the veterinarian diagnose idiopathic epilepsy and establish an effective medication protocol that reduced seizure frequency by 80%.
IMPORTANT: While most seizures are not immediately life-threatening, they can indicate serious underlying conditions. Always consult your veterinarian following a seizure episode, even if your pet appears to recover completely.
Building Your Pet First Aid Kit
A well-stocked pet first aid kit forms the foundation of emergency preparedness. Whether at home or traveling with your pet, having essential supplies readily available can make a significant difference in emergency outcomes.
Essential Components for Your Pet First Aid Kit
Basic Supplies:
- Digital thermometer (normal temperatures: dogs 101-102.5°F, cats 100.5-102.5°F)
- Gauze pads and rolls (various sizes)
- Self-adhering bandage wrap (like Vetrap)
- Adhesive medical tape
- Cotton balls and swabs
- Sterile saline solution
- Hydrogen peroxide 3% (ONLY for inducing vomiting when directed by a veterinarian)
- Antibiotic ointment (pet-safe)
- Styptic powder (for nail bleeding)
- Alcohol wipes
- Disposable gloves
- Tweezers and blunt-tip scissors
- Small flashlight
- Muzzle or cloth strips (to prevent biting in pain)
- Oral syringe or turkey baster
- Emergency blanket
- Clean towels
Documentation and Resources:
- Emergency contact list (regular vet, emergency vet, poison control)
- Medical records including vaccinations
- Current medications list and doses
- Recent photo of your pet
- Pet first aid manual or app
- Small notebook and pen
Animal-Specific Items:
- Elizabethan collar (cone)
- Nylon leash and collapsible water bowl
- Pet carrier for small animals
- Liquid dish soap (for grease/oil exposure)
- Activated charcoal (use only when directed by a professional)
Storage and Maintenance
- Choose appropriate storage:
- Water-resistant container
- Clearly labeled “Pet First Aid”
- Portable enough to grab quickly
- Store in accessible location known to all household members
- Regular maintenance:
- Check expiration dates quarterly
- Replace used or expired items promptly
- Update emergency contact information as needed
- Review kit contents after each use
- Location considerations:
- Keep primary kit in central home location
- Consider smaller travel kits for car and outings
- Store away from pets but accessible to humans
Customizing Your Kit
Different pets may require specific additions:
- For senior pets: Joint support wraps, extra padding
- For diabetic pets: Glucose monitoring supplies, honey (for hypoglycemia)
- For epileptic pets: Anti-seizure medications, rectal diazepam (if prescribed)
- For allergic pets: Antihistamines (veterinarian-approved doses)
According to a survey by the American Animal Hospital Association, pets whose owners maintain fully stocked first aid kits receive emergency care an average of 20 minutes faster than those without prepared supplies.
Expert Insight: “A comprehensive first aid kit isn’t just about bandages and gauze,” explains veterinary technician Maria Rodriguez. “The documentation components—particularly your pet’s medical history and emergency contacts—can be just as crucial in an emergency situation as the physical supplies.”
TIP: Consider taking a pet-specific first aid course to learn proper techniques for using your kit supplies. Organizations like the Red Cross and Pet Tech offer specialized training for pet owners.
When to Contact Emergency Veterinary Services
Knowing when to seek professional veterinary care is a crucial aspect of pet first aid. While many situations can be temporarily managed with first aid techniques, certain conditions require immediate professional intervention.
Signs Requiring Immediate Veterinary Care
Respiratory Distress:
- Struggling to breathe
- Blue/purple gums or tongue
- Open-mouth breathing (especially in cats)
- Severe coughing or choking
- Collapsed
Cardiovascular Issues:
- Suspected poisoning/toxin exposure
- Pale or white gums
- Weak pulse
- Collapse or extreme weakness
- Cold extremities
Trauma-Related:
- Significant bleeding that doesn’t stop with pressure
- Deep wounds or punctures
- Animal bites
- Eye injuries
- Suspected broken bones
- Falls from heights
- Vehicle accidents (even if pet appears uninjured)
- Burns covering more than a postage stamp size
Neurological Signs:
- Seizures (especially first-time or multiple)
- Head tilt
- Sudden inability to walk
- Paralysis
- Loss of consciousness
Gastrointestinal Issues:
- Bloated, hard abdomen
- Unsuccessful attempts to vomit
- Severe/persistent vomiting or diarrhea
- Blood in vomit or stool
- Suspected foreign body ingestion
- Straining to urinate or defecate
Heat-Related:
- Body temperature above 104°F
- Excessive panting
- Bright red gums/tongue
- Weakness or collapse in heat
Preparing for Emergency Transport
- Call ahead:
- Alert the veterinary facility you’re coming
- Describe the emergency briefly
- Ask for specific transport instructions
- Safe transport:
- Minimize movement for injured pets
- Use a secure carrier when possible
- Create an improvised stretcher using a rigid board and blanket for larger pets
- Keep the pet warm but not overheated
- Documentation to bring:
- List of symptoms and timeline
- Any medications your pet takes
- Samples of vomit/stool/urine if relevant
- Packaging of any suspected toxins
A study published in the Journal of Veterinary Emergency and Critical Care found that proper transport techniques reduced the risk of complication by 30% compared to improper movement of injured animals.
Creating an Emergency Plan
- Identify facilities:
- Primary veterinarian location and hours
- Nearest 24-hour emergency clinic
- Backup emergency options
- Store contact information:
- Program numbers into your phone
- Post list on refrigerator/central location
- Include in your pet first aid kit
- Plan transportation options:
- Personal vehicle
- Friend/family member contacts
- Pet-friendly taxi services
- Emergency pet ambulance services (if available in your area)
- Financial preparedness:
- Research pet insurance options
- Establish emergency pet care fund
- Investigate CareCredit or similar payment plans
- Know approximate costs for common emergencies
Expert Insight: “One of the most common mistakes pet owners make is the ‘wait and see’ approach,” cautions Dr. James Wilson, emergency veterinarian. “With true emergencies, every minute counts. When in doubt, it’s always better to seek professional care and find it wasn’t needed than to delay necessary treatment.”
IMPORTANT: Keep in mind that first aid is designed to stabilize, not replace professional veterinary care. Always follow up with your veterinarian after administering first aid, even if your pet appears to recover.
Preventative Measures
The best emergency is one that never happens. Incorporating preventative strategies into your pet care routine significantly reduces the likelihood of needing to apply pet first aid techniques.
Home Safety Assessment
- Secure toxic substances:
- Store medications in closed cabinets
- Keep cleaning products in locked storage
- Remove toxic plants or place out of reach
- Properly store automotive fluids
- Use pet-safe ice melts and lawn treatments
- Physical safety measures:
- Eliminate choking hazards
- Cover electrical cords
- Install baby gates near stairs for elderly/small pets
- Secure heavy furniture that could tip
- Remove small objects that could be swallowed
- Check for gaps in fencing
- Install pool safety features
- Seasonal considerations:
- Provide adequate shelter from weather extremes
- Never leave pets in vehicles
- Adjust exercise routines during temperature extremes
- Monitor for seasonal toxins (antifreeze, certain mushrooms)
Routine Health Maintenance
- Regular veterinary care:
- Annual wellness exams (semi-annual for seniors)
- Stay current on vaccinations
- Maintain parasite prevention
- Schedule dental cleanings as recommended
- Monitoring baselines:
- Know your pet’s normal vital signs
- Monitor weight consistently
- Track eating, drinking, and elimination habits
- Note typical energy levels and behavior patterns
- Lifestyle considerations:
- Maintain appropriate weight
- Provide regular exercise
- Consider breed-specific health risks
- Offer mental stimulation
- Practice proper dental care
Training and Behavioral Safety
- Basic commands that prevent emergencies:
- Reliable recall
- “Leave it” command
- “Drop it” command
- “Stay” or “wait” at doorways
- Proper socialization:
- Controlled introduction to other animals
- Positive exposure to various environments
- Recognition of stress signals
- Travel safety:
- Use appropriate restraint systems
- Never allow pets to ride unrestrained
- Use carriers for small animals
- Take regular breaks on long journeys
- Never leave pets unattended in vehicles
According to PetPlan insurance data, preventable accidents account for approximately 40% of all emergency veterinary visits, with an average cost of $800-$1,500 per incident.
Case Study: The Martinez family conducted a thorough pet safety assessment after adopting their first dog. They secured toxic cleaning supplies, installed baby gates, and covered electrical cords. Six months later, their puppy Luna knocked over a trash can but was unable to access the chocolate wrappers inside due to their childproof lock—preventing a potential poisoning emergency.
TIP: Consider taking photos of your pet from multiple angles when healthy. These images can serve as valuable comparison points if you need to assess injury or illness severity later.
Frequently Asked Questions
What are the most essential items in a pet first aid kit?
The most critical components of any pet first aid kit include gauze pads and rolls, self-adhering bandage material, digital thermometer, saline solution, tweezers, scissors, and emergency contact information. These items allow you to address the most common emergencies until veterinary care can be accessed. Additionally, including a pet first aid reference guide helps ensure proper technique during stressful situations.
How can I tell if my pet is in pain?
Pets often hide signs of pain as an evolutionary protection mechanism. Look for subtle indicators including: reduced activity, decreased appetite, reluctance to jump or climb stairs, excessive licking of a particular area, unusual aggression when touched, altered posture, heavy panting not related to exercise or heat, and changes in sleep patterns. Cats may purr when in pain, contrary to popular belief. Any significant behavioral change warrants veterinary investigation.
Is human medication safe for pets in emergencies?
No, most human medications are dangerous for pets, even in emergencies. Never administer pain relievers (especially acetaminophen, ibuprofen, or aspirin), antihistamines, or any prescription medications without specific veterinary guidance. Human dosages and metabolic processing differ significantly from pets. Instead, focus on appropriate first aid measures and seek professional care promptly.
How do I safely transport an injured pet?
For small pets, use a secure carrier lined with towels or blankets. For larger dogs with potential spinal injuries, create an improvised stretcher using a rigid surface (like a board) covered with a blanket. Minimize movement and stabilize the animal’s position. Remain calm and speak soothingly during transport. If possible, have someone call ahead to the veterinary facility while another person handles transportation.
When should I induce vomiting for suspected poisoning?
Inducing vomiting should ONLY be done under direct guidance from a veterinary professional or poison control center. Many substances (petroleum products, caustic materials, sharp objects) can cause additional harm if vomited. Additionally, inducing vomiting in symptomatic pets or those with certain health conditions can be dangerous. Always call your veterinarian or pet poison control before attempting any home treatment for poisoning.
How can I prepare my pet for potential emergencies?
Preparation includes multiple elements: training your pet to accept handling of paws, mouth, and ears; accustoming them to different types of restraint; maintaining up-to-date identification (collar tags and microchip); keeping current photos available; establishing relationship with local emergency veterinary facility before needed; and practicing emergency transport scenarios. Additionally, learning to regularly check vital signs when your pet is healthy establishes valuable baseline information.
For more expert pet care tips and product recommendations, visit BlithePet.com — your trusted source for pet wellness.
Conclusion
Mastering these five essential pet first aid techniques—bleeding control, CPR, choking management, poisoning response, and seizure care—empowers you to act confidently during pet emergencies. While these skills can stabilize your pet’s condition, remember they complement rather than replace professional veterinary care.
The American Veterinary Medical Association reports that proper first aid increases positive outcomes by up to 60% in emergency situations. By investing time in learning these techniques and assembling appropriate supplies, you’re taking a crucial step in responsible pet ownership.
As Dr. Rebecca Martinez, president of the Veterinary Emergency and Critical Care Society, emphasizes: “The partnership between informed pet owners and veterinary professionals creates the best possible scenario for pets facing emergency situations. First aid knowledge bridges the critical gap between injury and professional treatment.”
Take time today to assemble your pet first aid kit, program emergency numbers into your phone, and consider enrolling in a pet first aid certification course. These proactive steps could one day save your beloved companion’s life.
Have a similar experience with your pet? Share it in the comments below!


