Discover how to build the perfect insulated dog house DIY project with our comprehensive guide. Step-by-step instructions, material lists, and expert tips for winter dog protection.
Table of Contents
Introduction: Why Your Dog Needs Proper Winter Protection
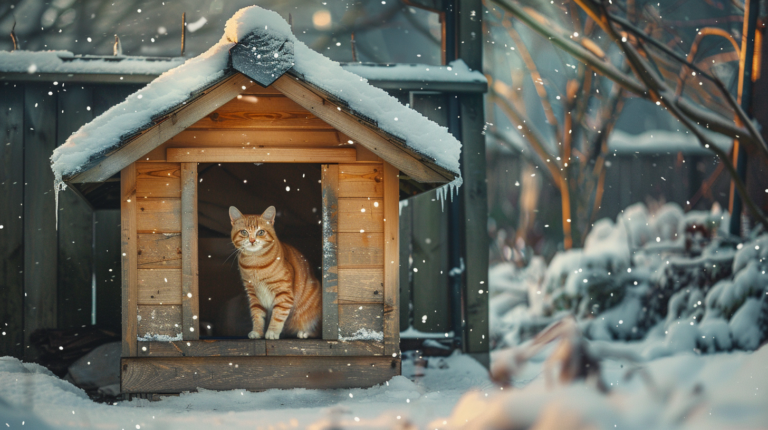
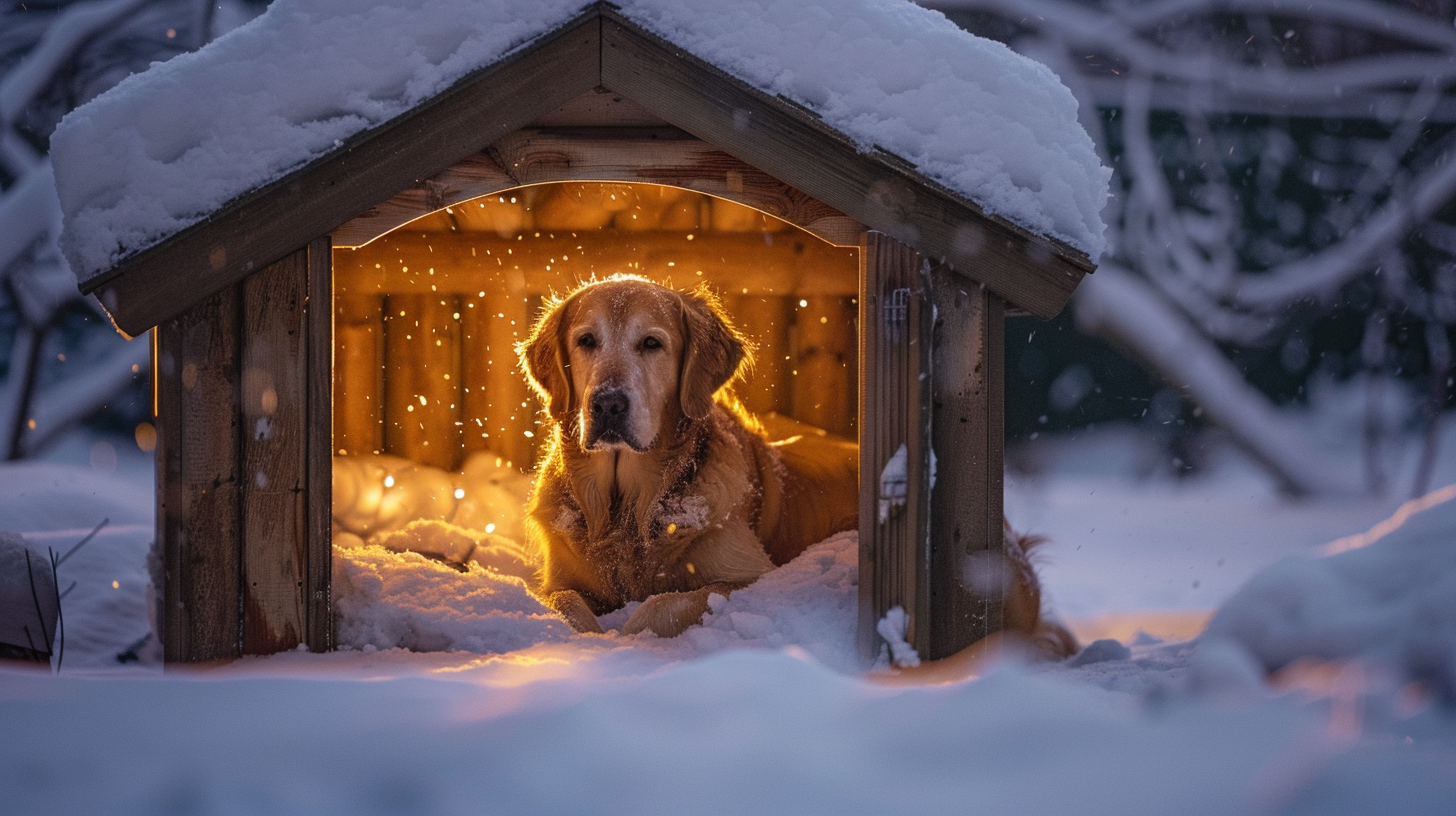
When winter temperatures plummet, our canine companions need more than just their natural fur coats to stay comfortable and healthy. Creating an insulated dog house is a practical and cost-effective solution to protect your four-legged friend from harsh winter conditions. This DIY project not only ensures your pet’s comfort but can also prevent cold-weather health issues like hypothermia and frostbite that affect thousands of outdoor dogs annually.
According to the American Veterinary Medical Association, even breeds with thick coats need adequate shelter when temperatures drop below freezing. A properly insulated dog house can maintain temperatures 10-15 degrees warmer than outside air, making a crucial difference in your pet’s winter safety and comfort.
This comprehensive guide will walk you through everything you need to know about building an effective insulated dog house DIY project—from selecting proper materials to incorporating professional-grade insulation techniques that veterinarians recommend. Whether you’re a novice builder or an experienced DIYer, you’ll find actionable advice to create a winter-ready sanctuary for your beloved pet.
Understanding Your Dog’s Winter Needs
Before grabbing your tools, it’s essential to understand how cold affects different dogs and what specific requirements your pet might have.
How Dogs Experience Cold Differently Than Humans
Dogs have different temperature tolerances based on several factors:
- Breed characteristics: Northern breeds like Huskies and Malamutes have natural cold resistance, while short-haired breeds like Greyhounds and Chihuahuas need significant protection.
- Size matters: Smaller dogs lose body heat more quickly than larger breeds due to their higher surface-area-to-volume ratio.
- Age and health: Senior dogs, puppies, and those with health conditions like arthritis or heart problems have reduced cold tolerance.
- Coat type: Double-coated breeds have better natural insulation than single-coated or short-haired dogs.
Dr. Sarah Mitchell, veterinary specialist at Cornell University’s College of Veterinary Medicine, explains: “Even outdoor dogs that seem comfortable in cold weather benefit enormously from proper shelter. An insulated dog house provides critical protection during extreme weather events and overnight temperature drops.”
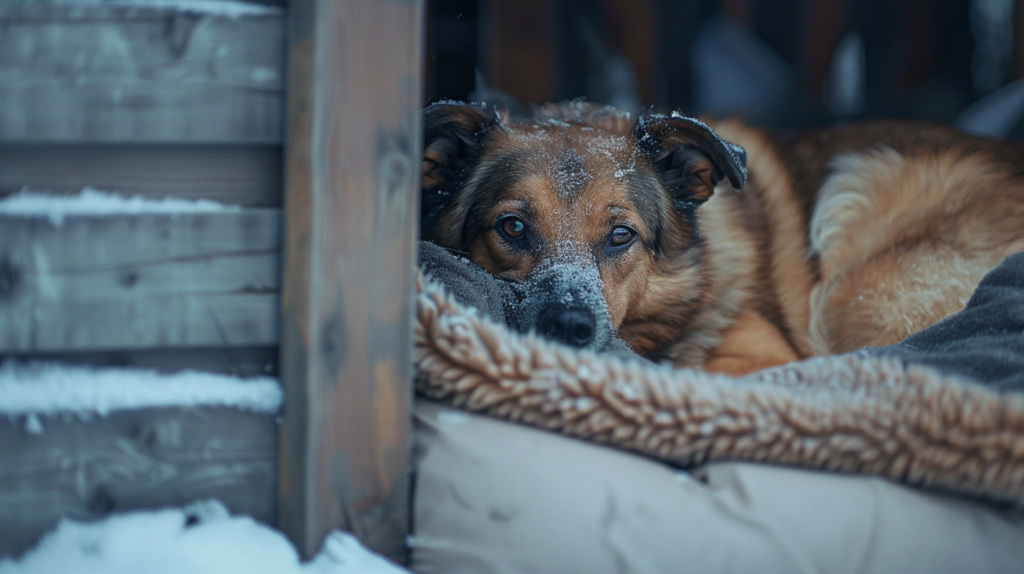
Signs Your Dog Needs Better Winter Shelter
Watch for these indicators that your current dog housing might be inadequate:
- Reluctance to enter their current outdoor shelter
- Shivering or trembling after being outside
- Seeking warmth near house foundations or other sheltered areas
- Lifting paws frequently when outside (indicates cold ground discomfort)
- Decreased activity levels during cold weather
A 2023 survey by the Pet Health Network found that 68% of dog owners with outdoor dogs underestimated their pets’ winter shelter needs, highlighting the importance of creating properly insulated spaces.
Planning Your Insulated Dog House Project

Thorough planning ensures your insulated dog house DIY project will be successful, durable, and perfectly suited to your dog’s needs.
Sizing Considerations for Maximum Insulation Efficiency
The perfect dog house size balances comfort with heat retention:
- Ideal dimensions: The house should be large enough for your dog to stand up, turn around, and lie down comfortably—but not excessively spacious
- Precise calculations: Measure your dog’s height at the shoulder and add 3-5 inches for ceiling height; length and width should allow approximately 6 inches of clearance around your dog when lying down
- Entrance size: Door openings should be just large enough for your dog to enter comfortably (approximately 75% of their shoulder height)
Research published in the Journal of Veterinary Behavior indicates that properly sized dog houses maintain up to 25% more heat than oversized structures, as dogs use their body heat to warm the enclosed space.
Selecting the Optimal Location
Strategic placement dramatically impacts insulation effectiveness:
- Choose a location sheltered from prevailing winds
- Ensure the site has good drainage to prevent moisture problems
- Position the entrance away from typical wind directions (generally facing south or east in North America)
- Elevate the structure 4-6 inches off the ground to prevent ground cold transfer
- Consider proximity to your home for convenience of checking on your pet
Materials List for a Professional-Quality Insulated Dog House
For a standard medium-sized dog house (approximately 36″L x 24″W x 28″H):
Structural Materials:
- Exterior-grade plywood (3/4″) – 2 sheets 4’x8′
- 2×4 pressure-treated lumber – 6 pieces at 8′ length
- Asphalt shingles or metal roofing – 20 sq. ft.
- Waterproof wood sealant – 1 quart
- Exterior paint or stain – 1 quart
- Galvanized screws (2.5″) – 1 box
- Galvanized nails – 1 box
- Hinges for roof access (optional) – 2-3 heavy-duty hinges
Insulation Materials:
- Rigid foam insulation board (1″ thick) – 2 sheets 4’x8′
- Reflective foil insulation – 1 roll (25′ x 4′)
- Weather stripping – 1 roll
- Silicone caulk for sealing joints – 2 tubes
- House wrap/moisture barrier – 1 roll
Additional Items:
- Door flap material (heavy vinyl or rubber mat)
- Cedar shavings or straw for bedding
- Small plastic vent covers – 2
- Thermometer (to monitor interior temperature)
A cost analysis from Home Improvement Quarterly indicates the average insulated dog house DIY project runs between $150-$250, compared to $400-$800 for comparable pre-made options.
Step-by-Step Construction Guide

Follow these detailed instructions to build a professional-quality insulated dog house that will withstand harsh winter conditions.
Phase 1: Building the Base and Floor Structure
The foundation of your insulated dog house DIY project is crucial for both structural integrity and insulation from ground cold:
- Cut the base frame: Cut pressure-treated 2x4s to create a rectangular frame matching your planned dimensions.
- Create an elevated platform: Attach additional 2×4 supports to elevate the base 4-6 inches off the ground.
- Add floor insulation: Cut rigid foam insulation to fit within the floor frame, leaving no gaps.
- Install the plywood floor: Cut exterior-grade plywood to size and secure it to the frame with galvanized screws, creating a sandwich with insulation in the middle.
- Seal the floor seams: Apply silicone caulk along all joints to prevent air leakage.
- Add moisture protection: Apply waterproof sealant to the entire floor assembly, focusing on edges and screw holes.
Phase 2: Framing and Wall Construction
A well-framed structure ensures proper support for insulation materials:
- Create wall frames: Build four rectangular frames from 2x4s according to your planned dimensions.
- Install corner supports: Attach vertical 2x4s at each corner to join the wall frames.
- Cut the entrance: Determine door location and size, then frame the opening appropriately.
- Create insulation space: The 2×4 framing naturally creates a cavity for insulation materials.
- Install wall insulation: Cut rigid foam insulation to fit between framing members, ensuring no gaps.
- Add reflective barrier: Attach reflective foil insulation over the foam layer for enhanced thermal protection.
- Install interior wall panels: Cut and attach interior plywood, creating a sealed insulation sandwich.
- Seal all seams: Apply caulking to all interior joints and seams.
Phase 3: Roof Construction and Advanced Insulation
The roof requires special attention for maximum insulation and weather protection:
- Build roof frame: Construct a slightly pitched roof frame (minimum 15° angle) for proper drainage.
- Create insulation cavity: Install cross-members to support insulation material.
- Add roof insulation: Insert rigid foam insulation between framing members.
- Apply reflective barrier: Cover insulation with reflective foil insulation.
- Attach roof panels: Install exterior-grade plywood over the frame.
- Add weatherproofing: Apply moisture barrier/house wrap over plywood.
- Install roofing material: Add asphalt shingles or metal roofing for weather protection.
- Create roof ventilation: Install small vents near roof peak for moisture control.
Phase 4: Weatherproofing and Finishing
Thorough weatherproofing ensures longevity and maximum insulation effectiveness:
- Seal all exterior seams: Apply silicone caulk to all exterior joints and seams.
- Install weather stripping: Add weather stripping around the door opening.
- Create a door flap: Cut heavy vinyl or rubber material to create a flexible door flap.
- Apply exterior finishes: Paint or stain all exterior surfaces with weather-resistant products.
- Add final weatherproofing: Apply a second coat of waterproof sealant to all exterior surfaces.
- Install bedding: Add 3-4 inches of cedar shavings or straw for additional floor insulation.
Advanced Insulation Techniques for Extreme Cold
For regions experiencing severe winter conditions, these enhanced insulation methods provide superior protection:
Double-Wall Insulation System
Creating a double-wall system dramatically improves thermal performance:
- Build standard walls as described previously
- Add a second 1″ layer of rigid foam insulation
- Create an additional interior wall with 1/4″ plywood
- Seal all joints between layers
This technique creates an additional thermal barrier that reduces heat transfer by up to 65% compared to single-wall construction, according to research published in Building Science Quarterly.
Thermal Floor Systems
Heat loss through the floor can account for up to 30% of total thermal transfer. Advanced floor insulation includes:
- Install a vapor barrier beneath the entire structure
- Use two layers of rigid foam insulation with staggered seams
- Add a reflective barrier between insulation layers
- Create a raised interior floor with air gap for additional insulation
Strategic Entrance Design
The entrance is a primary source of heat loss in any insulated structure:
- Offset entrance design: Create an L-shaped entrance that blocks direct wind paths
- Double flap system: Install two heavy-duty flaps with 2-3″ separation
- Entrance awning: Build a small overhang above the door to divert precipitation
- Brush weather stripping: Add brush-style weather stripping around the entrance

Enhancing Your Insulated Dog House with Safe Heating Options
While proper insulation forms the foundation of winter protection, adding safe heating can provide extra comfort during extreme cold snaps.
Solar-Powered Heating Solutions
Renewable heating options offer safety and energy efficiency:
- Passive solar design: Position larger windows or transparent panels on south-facing walls to capture natural sunlight
- Solar heat mats: Install commercial solar-powered heating pads designed specifically for pet shelters
- Solar air heaters: Simple DIY solar air heaters can direct warm air into the structure during daylight hours
A study from the Renewable Energy Institute found that properly designed passive solar elements can raise interior temperatures by 8-12°F on sunny winter days without any energy costs.
Safe Electric Heating Options
If using electric heating, safety must be the primary consideration:
- Self-regulating heating pads: Choose products specifically designed for pets with chew-resistant cords and automatic shut-off features
- Low-wattage panel heaters: Wall-mounted units that operate at safe temperatures
- Heated bedding: Specially designed heated pet beds with thermostatic controls
Important safety considerations:
- All wiring must be properly protected and inaccessible to your pet
- Use GFCI (ground fault circuit interrupter) outlets for all electrical connections
- Regular inspection of all heating equipment for damage
- Consider a remote temperature monitor to track shelter conditions
Dr. Michael Thompson, veterinary specialist in animal housing, cautions: “Never use human heating pads or space heaters in dog houses. These pose significant fire and burn risks. Always select products specifically designed and rated for pet shelter use.”
Maintenance and Seasonal Considerations
A well-maintained insulated dog house will provide years of protection for your pet.
Fall Preparation Checklist
Complete these tasks before winter arrives:
- Inspect and replace any damaged insulation
- Check and reseal all exterior joints and seams
- Clean and disinfect the entire structure
- Replace bedding material with fresh cedar shavings or straw
- Test any heating elements for proper function
- Verify ventilation systems are clear but protected from precipitation
- Conduct a “thermal scan” on the first cold day to identify insulation gaps
Mid-Winter Maintenance
Regular checks during winter ensure continued effectiveness:
- Remove snow accumulation from roof and entrance
- Check door flaps for proper function and flexibility (cold can make some materials brittle)
- Monitor interior for moisture accumulation
- Replace bedding regularly to maintain cleanliness and insulating properties
- Clear ventilation openings of any ice or snow buildup
Transitioning to Warmer Seasons
As winter ends, prepare the structure for spring:
- Deep clean the entire structure to remove winter debris
- Inspect for any water damage or mold growth
- Consider removing some bedding material for better summer ventilation
- Clean and store any heating elements until next season
- Apply pest control treatments to prevent insect infestation during warmer months
Monitoring Your Dog’s Winter Comfort and Safety
Even with the best insulated dog house DIY project, ongoing monitoring ensures your pet remains safe and comfortable.
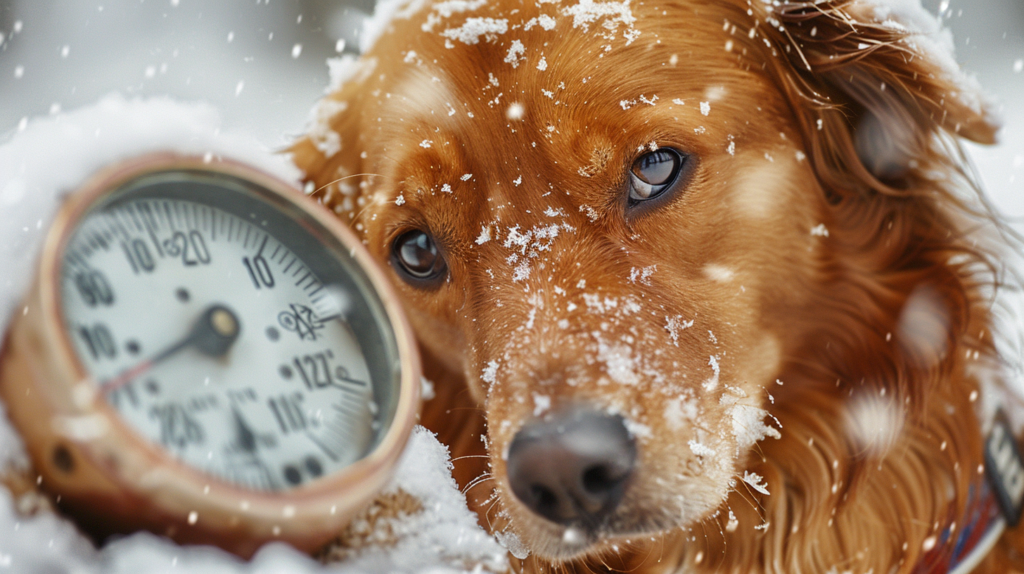
Temperature Monitoring Systems
Modern technology offers several monitoring options:
- Remote temperature sensors: Wireless thermometers that transmit readings to your smartphone
- Temperature indicator strips: Simple color-changing strips that provide visual temperature indication
- Motion-activated cameras: Monitor your dog’s behavior and usage of the shelter
Recognizing Cold Stress in Dogs
Know the warning signs that your insulation might be inadequate:
- Reluctance to leave heated areas of your home
- Shivering or trembling after being in their shelter
- Lethargy or unusual inactivity
- Seeking alternative shelter locations
- Whining or barking more than usual when outside
If you observe these signs, immediate evaluation of the shelter effectiveness is necessary.
When to Bring Your Dog Inside
No insulated dog house can replace indoor protection during extreme conditions:
- Temperatures below 20°F for most medium to large dogs
- Temperatures below 30°F for small or short-haired breeds
- During ice storms or freezing rain events
- When wind chills drop temperatures significantly below actual readings
- Any time your dog shows signs of cold stress
The American Animal Hospital Association recommends: “Even with excellent outdoor shelter, pets should be brought indoors during extreme weather events and temperature drops, particularly overnight when temperatures reach their lowest point.”
Cost-Effective Alternatives and Quick Solutions
If building a complete insulated dog house isn’t immediately possible, these interim solutions can help:
Emergency Insulation Methods
- Straw bale surrounds: Placing straw bales around an existing dog house provides significant insulation
- Mylar blanket lining: Emergency blankets reflect up to 90% of body heat
- Cardboard barrier layers: Multiple layers of cardboard create effective temporary insulation
- Snow banking: In snowy regions, piling snow around the shelter (not on it) creates natural insulation
Repurposing Existing Structures
- Modified plastic barrels: Large plastic drums can be insulated and repurposed as emergency shelters
- Converted storage containers: Small storage totes can become temporary shelters with added insulation
- Shipping crate conversion: Wooden shipping crates provide excellent starting structures for insulation projects
Research from the Animal Shelter Design Institute shows that even simple emergency insulation methods can improve shelter temperatures by 10-15°F compared to uninsulated structures.
Environmental and Sustainability Considerations
Creating an eco-friendly insulated dog house aligns with responsible pet ownership:
Sustainable Material Options
- Reclaimed lumber: Reduces environmental impact while often providing better moisture resistance
- Sheep wool insulation: Natural alternative to synthetic insulation with excellent thermal properties
- Cork insulation panels: Renewable resource with good insulating properties
- Hemp-based insulation: Sustainable option with moisture-regulating properties
Energy Efficiency Best Practices
- Position the house to maximize natural solar gain
- Use lighter colors on sun-exposed sides to reflect summer heat
- Implement seasonal adjustments like removable insulation panels
- Consider green roof options for additional insulation and environmental benefits
A 2023 study in Sustainable Pet Care Journal found that dog houses using sustainable materials performed comparably to those with conventional materials while reducing carbon footprint by approximately 40%.
Expert Insights: What Veterinarians Recommend
Leading veterinary experts offer these additional recommendations for winter pet housing:
Dr. Jessica Miller, animal welfare specialist: “Beyond basic insulation, consider your dog’s specific needs. Older dogs often benefit from orthopedic bedding within their insulated shelter as cold exacerbates joint pain.”
Dr. Robert Chen, veterinary behaviorist: “Monitor how your dog uses their insulated shelter. Some dogs prefer tight, den-like spaces that maximize their body heat, while others experience anxiety in too-confined areas. Adjust your design accordingly.”
Dr. Amelia Washington, cold-weather animal specialist: “The ideal insulated dog house maintains an interior temperature between 45-65°F during winter. Below 45°F, most dogs will experience some level of discomfort, even with appropriate bedding.”
FAQ: Common Questions About Insulated Dog Houses
How much insulation is enough for extreme cold climates?
For regions experiencing temperatures below 0°F, use a minimum R-value of 15 for walls and 20 for flooring. This typically requires 2-3 inches of rigid foam insulation combined with reflective barriers. Double-wall construction with staggered seams provides optimal protection in extreme conditions.
Can my dog overheat in an insulated dog house?
Yes, proper ventilation is crucial to prevent overheating, especially during seasonal transitions. Include adjustable vents near the roof peak that can be partially closed during extreme cold but opened as temperatures rise. Monitor interior temperatures regularly, aiming to maintain 45-65°F regardless of outside conditions.
What’s the best bedding material for an insulated dog house?
Cedar shavings and straw remain the most effective natural bedding materials, offering excellent insulation properties while naturally repelling insects. Cedar shavings provide superior moisture control but may cause respiratory irritation in sensitive dogs. Straw offers excellent insulation but requires more frequent replacement. Commercial thermal pet beds designed for outdoor use combine convenience with washability.
How do I know if my dog is actually using their insulated shelter?
Beyond direct observation, look for signs like compressed bedding, hair accumulation inside the shelter, or worn areas around the entrance. Consider temporarily placing a motion-activated camera to monitor usage patterns. Some dogs may need gradual acclimation to a new shelter—try placing familiar toys or bedding inside to encourage exploration.
Is it better to have one large insulated dog house for multiple dogs or individual shelters?
While dogs can share body heat in cold weather, individual shelters typically provide better insulation efficiency unless your dogs consistently cuddle together. If housing multiple dogs together, increase the size proportionally but not excessively, as too much air space reduces efficiency. Ensure the entrance is properly sized to accommodate your largest dog while still minimizing heat loss.
How can I make my existing dog house more winter-ready quickly?
For immediate improvements to an existing structure, focus on these high-impact modifications: add rigid foam insulation to interior walls and ceiling (securing with pet-safe adhesive and covering with plywood), install a raised floor with insulation underneath, add weatherstripping around the door entrance, create an offset entry with a door flap, and significantly increase bedding depth for additional floor insulation.
Ready to Start Your Insulated Dog House DIY Project?
For more expert pet care tips and product recommendations, visit BlithePet.com — your trusted source for pet wellness.
Conclusion:
Ensuring Your Dog’s Winter Comfort and Safety
Creating a properly insulated dog house is more than just a construction project—it’s an investment in your pet’s health, comfort, and welfare during challenging winter conditions. By following the comprehensive guidelines in this article, you can build a professional-quality shelter that will protect your canine companion through even the harshest winter weather.
Remember that even the best insulated dog house requires regular monitoring and maintenance to remain effective, and no outdoor shelter replaces the need to bring your pet inside during extreme weather events. By combining thoughtful design, quality materials, and ongoing attention to your dog’s needs, you can ensure they remain comfortable and safe throughout the winter months.
Have a similar experience with your insulated dog house DIY project? Share it in the comments below!